


How to Resolve “No Active Device Used for Your Location iPhone”?
In the ever-evolving landscape of technology, smartphones like the iPhone have become indispensable tools for communication, navigation, and entertainment. However, despite their sophistication, users sometimes encounter frustrating errors like “No Active Device Used for Your Location” on their iPhones. This issue can hinder various location-based services and cause inconvenience. In this comprehensive guide, we’ll delve into why this error occurs and explore effective solutions to resolve it.
1. Why does my iPhone Say No Active Device?
The “No Active Device Used for Your Location” error typically occurs when your iPhone is unable to determine its precise location or fails to connect to location services properly. This issue may be caused by a number of factors, including the following:
- Location Services Settings: Ensure that location services are enabled for the affected app(s) and that location permissions are granted.
- Poor GPS Signal: Weak GPS signals or interference from surrounding structures can disrupt location tracking, leading to the error.
- Software Glitches: Like any electronic device, iPhones may encounter software bugs or glitches that interfere with location services.
- Network Connectivity Issues: A stable internet connection is essential for accurate location tracking. If your iPhone struggles with network connectivity, it may fail to determine your location effectively.

2. How to Resolve the “No Active Device Used for Your Location” Error?
The “No Active Device Used for Your Location” error on iPhones can be a frustrating issue, especially when you rely on location-based services for various applications. Fortunately, there are several troubleshooting steps you can take to resolve this error and restore proper functionality to your device’s location services. Here’s a detailed guide on how to resolve the “No Active Device Used for Your Location” error:
Check Location Services Settings:
- Open Settings on your iPhone.
- Navigate to Privacy > Location Services.
- Ensure that Location Services are toggled on.
- Scroll down to find the specific app(s) experiencing the issue and ensure they have the necessary permissions (e.g., “While Using the App” or “Always”).
Restart Location Services:
- Navigate to the Settings menu, then select Privacy, and then select Location Services.
- Toggle off Location Services and wait for a few seconds.
- Toggle it back on and check if the error persists.
Reset Network Settings:
- Go to Settings > General > Reset.
- Select “Reset Network Settings.”
- Enter your passcode if prompted and confirm the action.
- After your device restarts, reconnect to your Wi-Fi network and check if the error is resolved.
Update iOS Software:
- First, check to see that the most recent version of iOS is installed on your iPhone.
- If not, navigate to Settings > General > Software Update and then download and install any updates that are available.
Calibrate Location Services:
- Navigate to the Settings menu, then select Privacy, then Location Services, and finally System Services.
- Turn off “Compass Calibration” and restart your iPhone.
- After rebooting, turn “Compass Calibration” back on.
Reset Location & Privacy Settings:
- Go to Settings > General > Reset.
- Select “Reset Location & Privacy.”
- Confirm the action by entering your passcode.
3. Bonus: One-Click Location Change with AimerLab MobiGo?
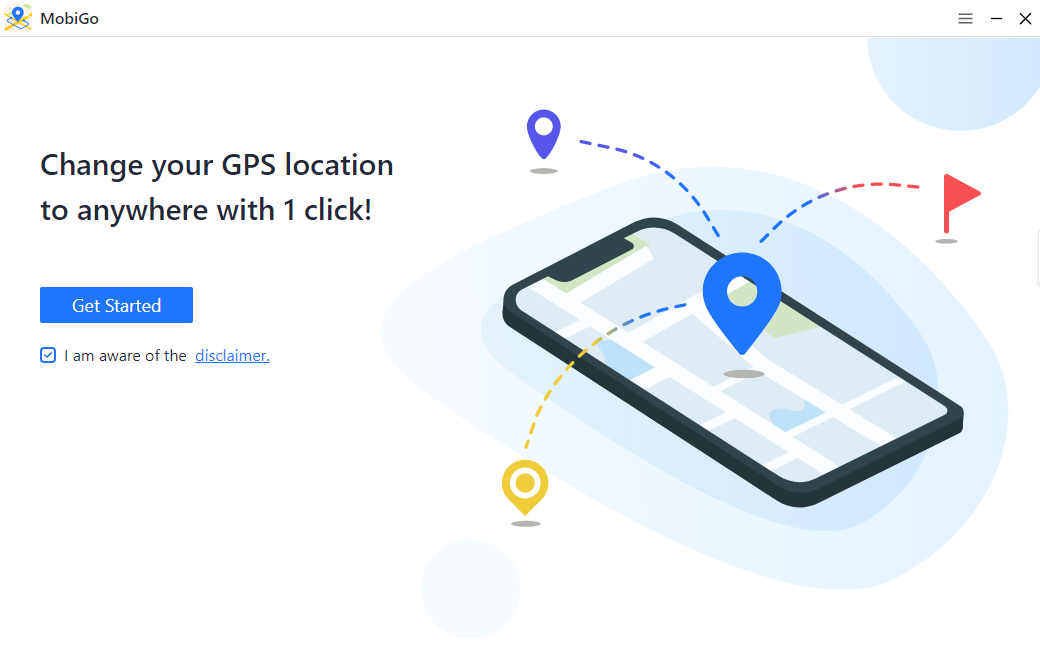
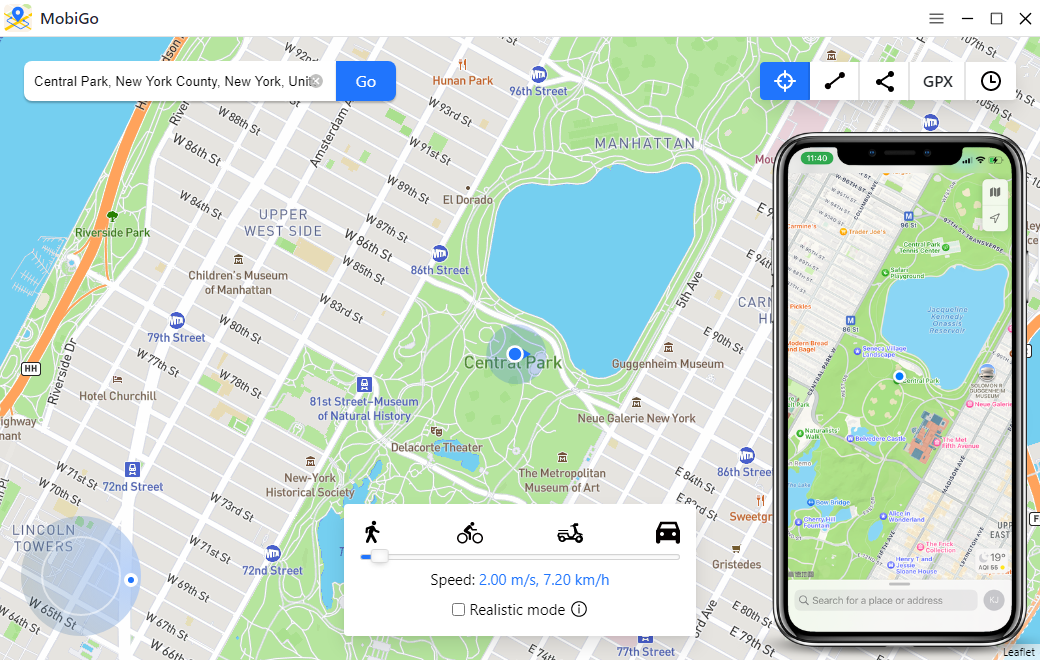
If you need to change your iPhone’s location for various purposes such as playing games, getting more matches on dating apps, testing apps, accessing geo-restricted content, or protecting your privacy, AimerLab MobiGo offers a convenient solution. AimerLab MobiGo is a software tool designed to change the location of your iOS device with ease. It allows users to spoof their iPhone or iPad’s GPS location to virtually any place in the world. Unlike some other location spoofing methods, MobiGo does not require jailbreaking your iOS device, making it accessible to a wider audience.
Here are the steps that you can follow to use the AimerLab MobiGo location changer to change your iPhone location in one click:
Step 2: To begin using MobiGo, click the “Get Started” button from the menu.
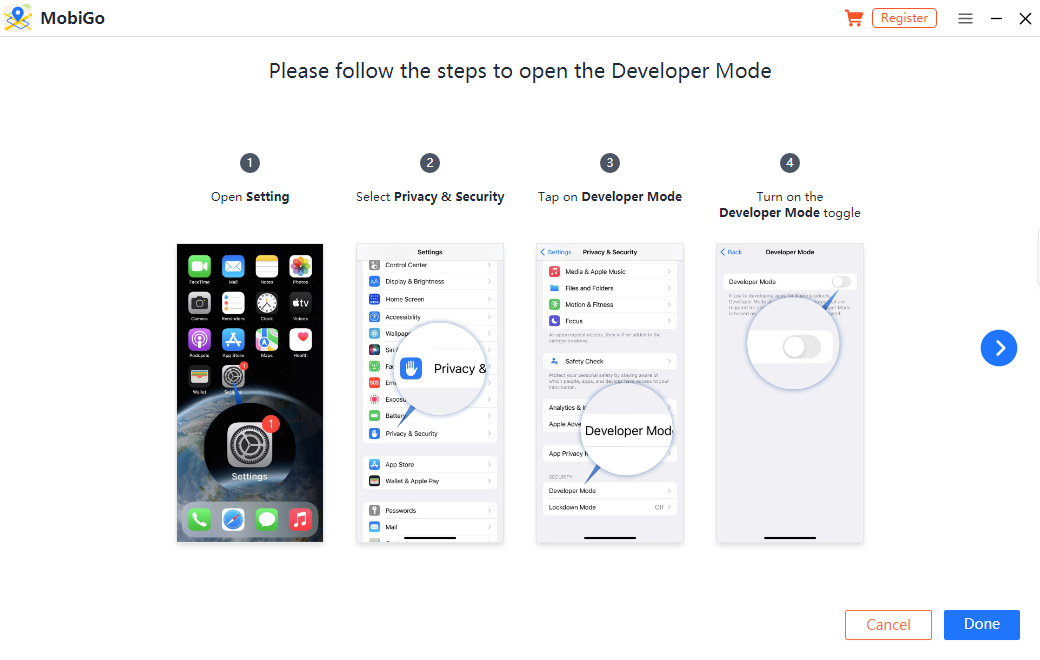
Step 3: Use a lightning cable to connect your iPhone to the computer, choose your device, and follow the steps on the screen to enable “Developer Mode” on your iPhone.
Step 4: With MobiGo’s “Teleport Mode” option, you can use the search bar to enter the location you want to set on your iPhone or directly click on the map to choose a location.
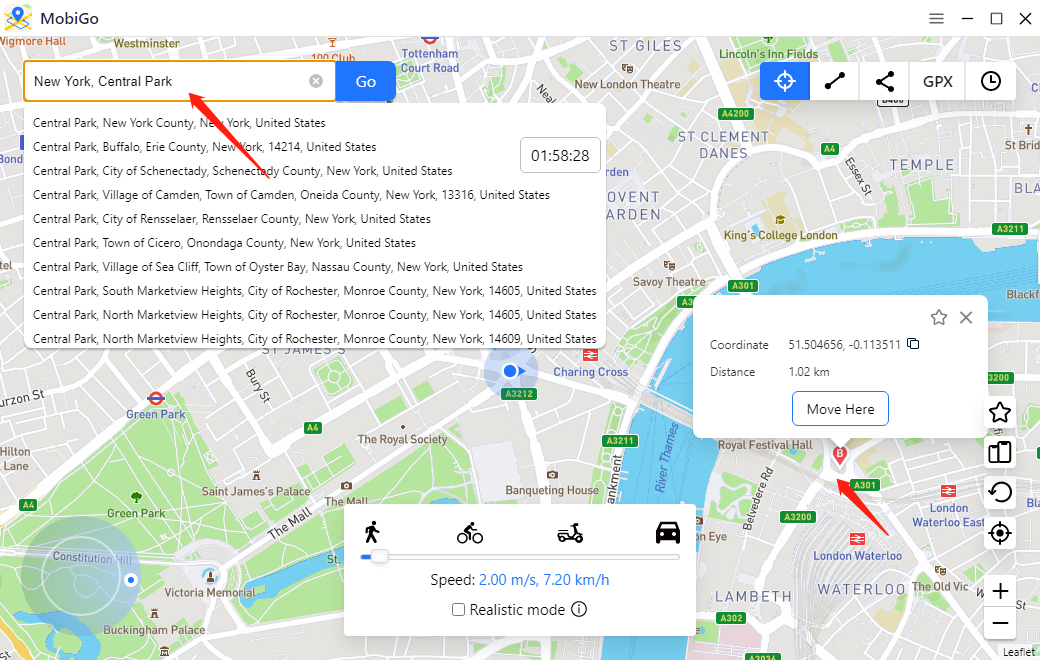
Step 5: Once you’re satisfied with the chosen location, click on the “Move Here” button to apply the new location to your iPhone.
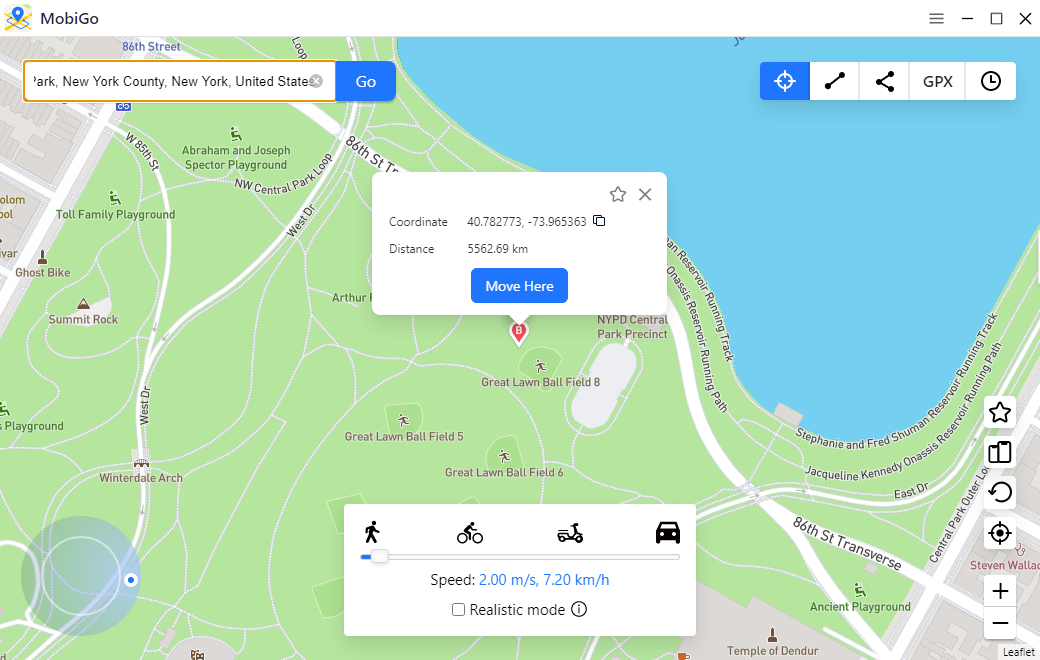
Step 6: You’ll receive a confirmation message indicating that the location change was successful. Verify the new location on your iPhone and start using it for location-based services or testing purposes.
Conclusion
Encountering the “No Active Device Used for Your Location” error on your iPhone can be frustrating, but by following the troubleshooting steps outlined above, you can effectively resolve the issue and restore proper functionality to your device’s location services. Additionally, AimerLab MobiGo provides a user-friendly solution for one-click location changes, offering flexibility and convenience for various purposes. With the MobiGo location changer, you can enjoy seamless location-based experiences on your iPhone, so we suggest downloading AimerLab MobiGo and giving it a try.
- How to Fix iPhone File Stuck on Waiting?
- How to Resolve iPhone Speaker Grayed Out?
- How to Fix iPhone Could Not Be Restored Error 9?
- iPhone Bluetooth Keeps Disconnecting? Try These Solutions
- How to Fix iPhone 14 Pro Max Screen Green Flickering?
- How to Resolve iPhone Switched to Incompatible eSIM Stuck in Boot Loop?