


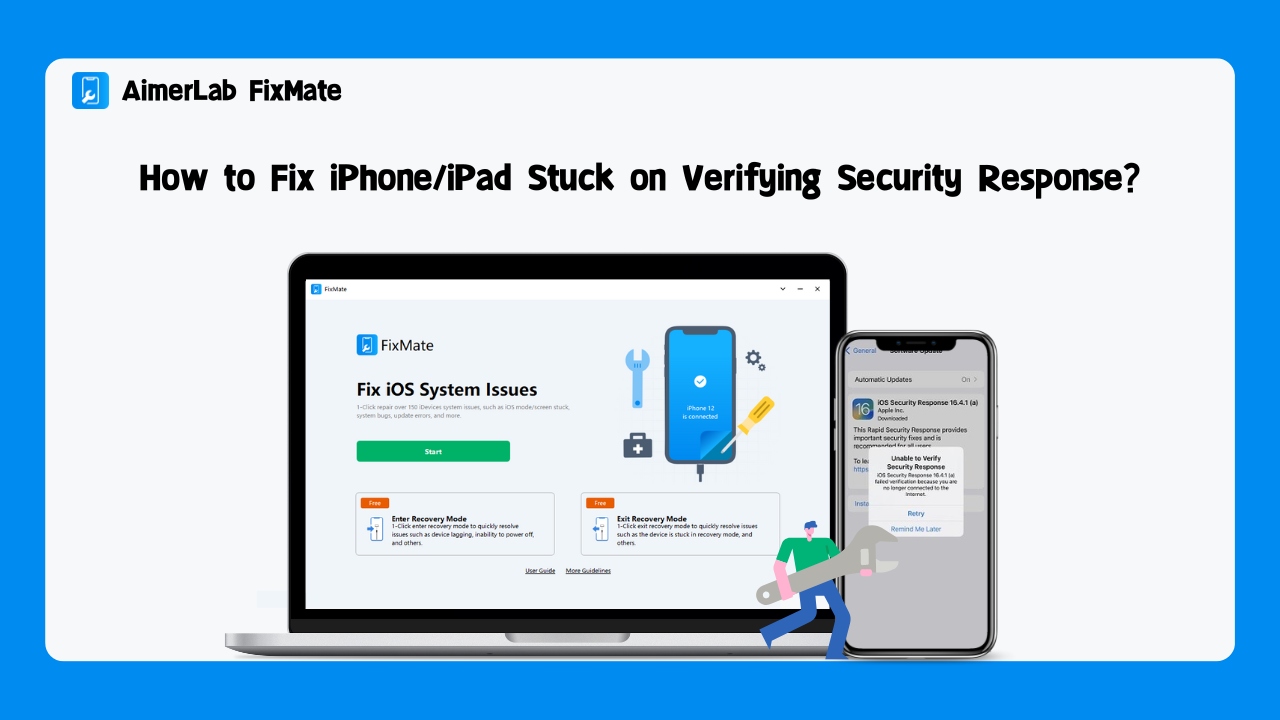
How to Fix iPhone/iPad Stuck on Verifying Security Response?
In an era where digital security is paramount, Apple’s iPhone and iPad devices have been lauded for their robust security features. A key aspect of this security is the verification security response mechanism. However, there are instances where users encounter obstacles, like the inability to verify security responses or getting stuck during the process. This article delves into the intricacies of iPhone/iPad verification security responses, explores the reasons behind verification failures, provides conventional solutions, and delves into advanced troubleshooting.
1. Why Unable to Verify Security Response?
Apple’s verification security response is a protective mechanism designed to ensure the security and privacy of user data on iPhones and iPads. When a user attempts to make changes to their Apple ID, access iCloud services, or perform other security-sensitive actions, the device prompts them to verify their identity. This is typically done by sending a verification code to a trusted device or phone number. Once the user enters the correct code, the security response is verified, granting access to the requested action.
Despite Apple’s stringent security measures, users may encounter situations where they are unable to verify their security response. This issue may be caused by a number of reasons, including the following:
- Network Issues: A stable internet connection is crucial for receiving verification codes. Poor network connectivity or disruptions may prevent the device from receiving the code, leading to verification failure.
- Device-Specific Problems: Software glitches or conflicts on the device itself can interfere with the verification process. These issues may arise from outdated software, corrupted files, or conflicting apps.
- Server Outages: At times, Apple’s servers might experience downtime or outages, which can affect the delivery of verification codes and disrupt the security response process.
- Two-Factor Authentication Settings: Incorrect settings or changes to two-factor authentication settings can lead to verification failures. Inconsistencies between device settings and Apple ID settings can cause conflicts.
- Trust Issues: If a device is not recognized as trusted or is removed from the list of trusted devices, the security response may fail.
2. How to Fix iPhone/iPad Stuck on Verifying Security Response
Encountering issues with verifying security responses can be frustrating, but there are several steps users can take to resolve the problem:1) Check Internet Connection
Ensure that your device has a stable internet connection, either through Wi-Fi or cellular data, to receive the verification code.2) Restart Device
A simple restart can often resolve minor software glitches that might be hindering the verification process.3) Update Software
Check to see that your device is using the most recent version of iOS or iPadOS. Software updates often include bug fixes and improvements that can address security response issues.4) Check Apple Server Status
Before troubleshooting extensively, verify if Apple’s servers are experiencing any outages. Visit Apple’s System Status page to check the operational status of their services.5) Correct Time and Date Settings
Incorrect date and time settings can disrupt verification processes. Ensure your device’s date and time settings are set to “Automatic.”6) Review Trusted Devices
Go to your Apple ID settings and review the list of trusted devices. Remove any devices that are no longer in use or that you do not recognize. Re-add your device if necessary.7) Reset Two-Factor Authentication
If two-factor authentication settings seem to be causing the issue, you can reset them by turning off two-factor authentication and then turning it back on. Follow the prompts carefully.8) Use a Different Trusted Device
If you have multiple trusted devices linked to your Apple ID, try using a different one to receive the verification code.
3. Advanced Method to Fix iPhone/iPad Stuck on Verifying Security Response
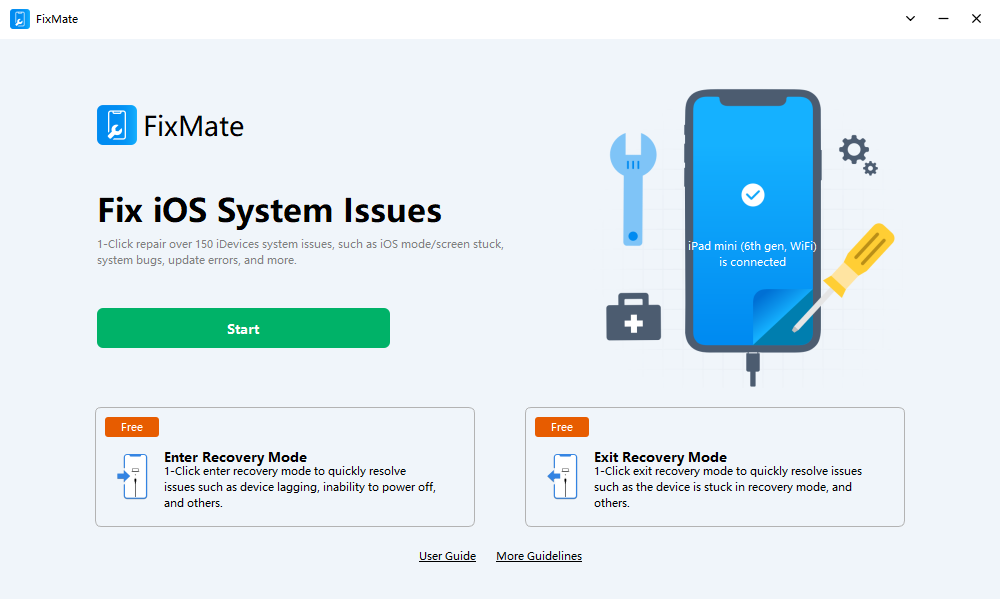
In situations where standard troubleshooting proves ineffective, an advanced tool like AimerLab FixMate can provide a comprehensive solution. AimerLab FixMate is an all-in-one iOS system repair tool that helps to resolve over 150 common and serious iOS/iPadOS/tvOS issues without losing data, such as stuck on verifying security response, stuck on recovery mode or DFU mode, stuck on white Apple logo, stuck on updating and any other system issues. Beside, FixMate aslo supports 1-click entering and exiting recovery mode for free.
Step 1: Download and Install FixMate on your computer by clicking the download button below.
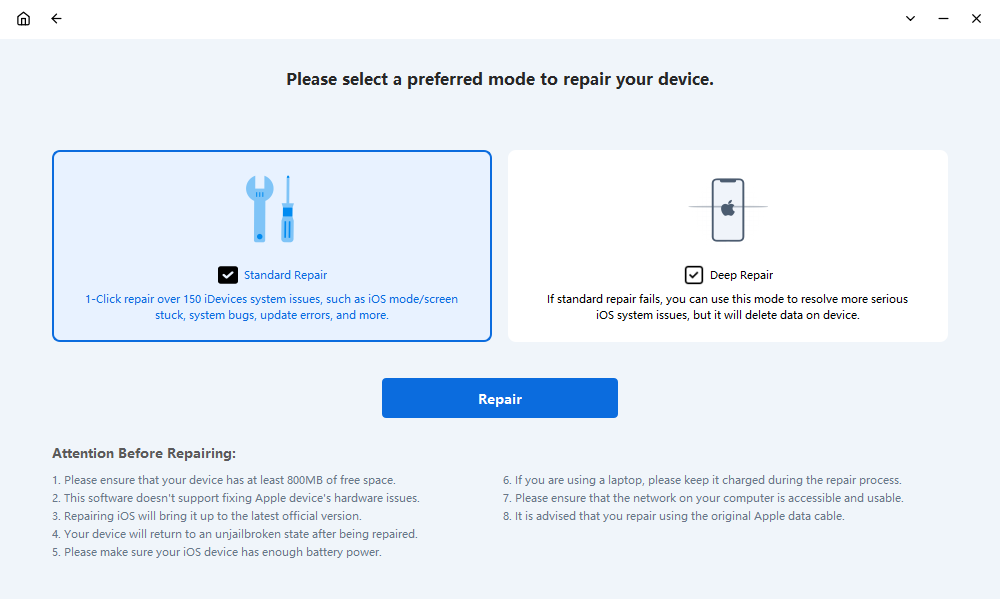
Step 3: Pick either the “Standard Repair” or the “Deep Repair” mode to get the process of fixing things started. The standard repair mode repairs basic system faults without losing data, but the deep repair mode resolves more critical issues but erases data from the device. To fix an iPad/iPhone that is stuck on verifying security response, it is recommended that you choose the standard repair mode.
Step 4: After choosing the firmware version that you want, click the “Repair” button to begin the process of downloading it to your computer.
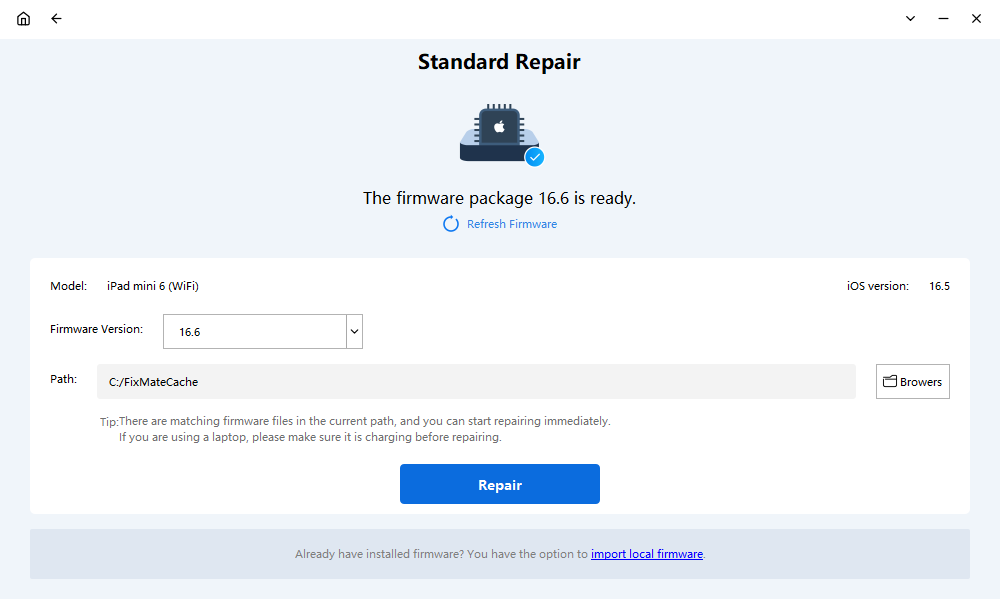
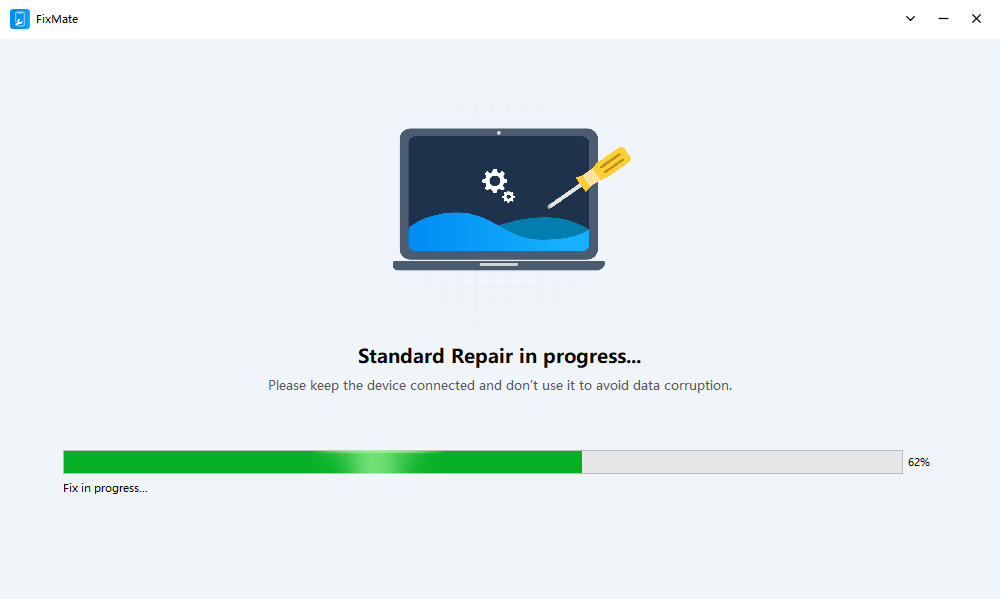
Step 5: When the download is complete, FixMate will begin fixing any system issues on your iPad or iPhone.
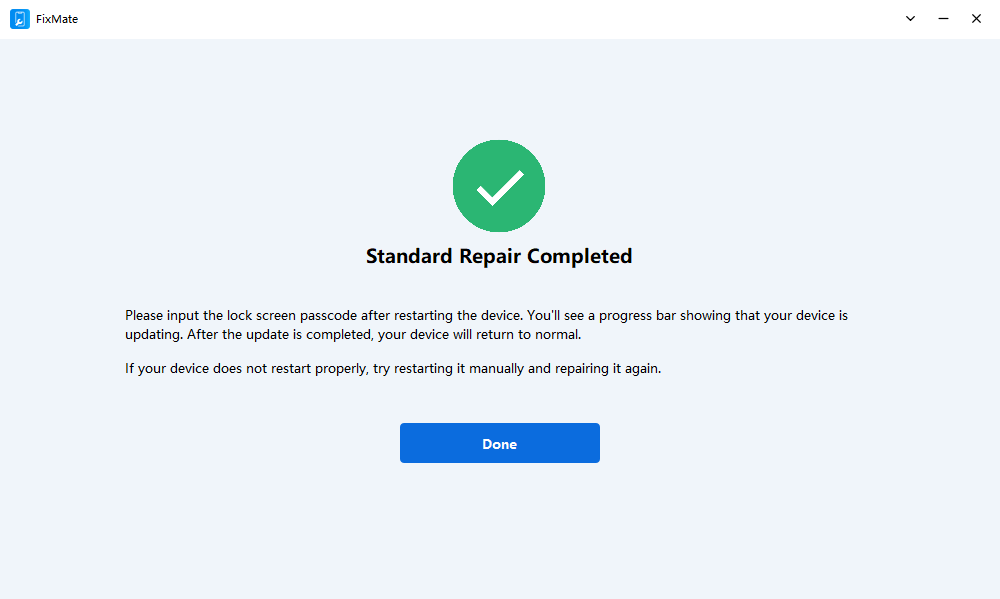
Step 6: After the issue has been fixed, your iPad or iPhone will automatically restart and go back to the way it was before the problem occurred.
4. Conclusion
Verifying security responses is a critical aspect of maintaining the security and privacy of your Apple devices. While encountering issues with this process can be frustrating, there are various steps you can take to troubleshoot and resolve the problem. By ensuring a stable network connection, updating software, and reviewing device settings, you can overcome verification obstacles and continue using your iPhone or iPad with confidence. If the issue persists, you can use the professional iOS system repair tool – AimerLab FixMate to fix this issue without losing data on your device, suggest downloading it and having a try.
- How to Resolve iPhone Speaker Grayed Out?
- How to Fix iPhone Could Not Be Restored Error 9?
- iPhone Bluetooth Keeps Disconnecting? Try These Solutions
- How to Fix iPhone 14 Pro Max Screen Green Flickering?
- How to Resolve iPhone Switched to Incompatible eSIM Stuck in Boot Loop?
- How to Resolve “iPhone Not Activated – Contact Your Carrier”?